

 Since retiring, I initially thought I’d be cooking a lot more with those extra 50 to 60 hours added back to each week. While working, I’d spend about three or four hours every Sunday making a large batch of weekday lunch and dinners, but that would be it for the whole week. I assumed that I now had the time to let those culinary creative juices flow, and I’d be spending one or two hours every day at the stovetop making complicated dishes that I always put on the back burner “until I retired.”
But a simpler life actually means less cooking, and because we’ve dropped from three daily meals to just two meals, when I do cook, I make less of whatever I’m cooking, primarily because I have the time to now cook in the middle of the week if need be.
Okay, it’s not possible to make a small pot of nishime, jai or chili, but for other dishes, I rarely use any pot larger than a five-quart Dutch oven.
This also means I use my thermal cookers and induction cooktop more than I did while I toiled on those Sunday afternoons.
The Mac Daddy
Tiger MiCom Induction rice cooker When I first purchased my high tech (at the time) rice cooker, the top models were just under $400, but they included an induction heating system that is over 80% energy efficient and sensors that detected moisture levels so that your rice was always cooked perfectly, whether it was premium Koshihikari, whole grain or mixed grain. They could also make porridge, bake bread and function as slow cookers so I felt like a bandit when I purchased mine for approximately $300. The top-of-the-line models now are in the $400-$600 price range, though you can still find lower capacity models for less than $300. I still feel that they shine when cooking whole grain or mixed rice and while I don’t need the 10-cup capacity on a regular basis, it’s still perfect when cooking for potluck parties.
Vermicular
When I tired of using the traditional sous vide method of cooking, mainly because of the eventual water disposal – pouring gallons of water into the kitchen sink without splashing a large amount over the whole kitchen countertop – I looked into the Vermicular induction cooker produced in Japan. For starters, the warm setting could be set in one degree increments between 90 and 200 degrees, there was a medium setting at 445 degrees to brown your proteins and an extra low setting at 230 degrees to simmer tougher cuts of meat. The cast iron Musui or Dutch oven had edges that were precisely milled to literally keep all moisture within the pot and the Kamado or induction cooker provided 3D cooking. Most induction cookers simply create heat on the bottom. The Kamado also provides induction on the sides of the Musui. The only downside was the cost, as the Musui was $300 and the Kamado was $370 and you had to purchase both unless you found a cheaper Dutch oven that fit perfectly within the Kamado. The Musui capacity is also only 3.9 quarts, which usually isn’t large enough for a family of four or five, but it’s the perfect size for the Tatsumotos. The total cost over six years later is still $670. The Musui is now listed at $330 and the Kamado at $340, though shipping is still free, even to the 50th.
Less Costly but Still Functional
The original induction cooktops were always affordable, but they only offered a couple of temperature settings translating to about 20 degrees per setting. As technology improves, most models now have settings in the five to 10 degree range while keeping costs under $100. There are also dual “burner” cooktops that can accommodate grill pans or allow you to cook two different dishes at the same time. Imagine making eight to 10 smash burgers for your hungry crowd while being energy efficient at the same time.
The only downside to induction cooking is the need for induction compatible cookware.
The simple test is if a magnet sticks to the bottom of your cookware, it’s compatible. If not, you’ll still need traditional gas, halogen or electric burners, which are all energy wasting means of cooking since more than half of the energy simply heats the air surrounding your cookware. For me, this means either donating all my All-Clad copper core and anodized aluminum cookware to Goodwill or adapting to creative method of using induction cookers, like using an induction compatible pot to boil water then placing my aluminum or bamboo steamer baskets on the compatible pot to steam bao or shumai.
There are stainless steel heat diffusers that can be placed on the induction cooktop that can then transfer heat to your aluminum, glass or other non-magnetic cooking vessels but these are just as energy wasting as using a gas or electric burner directly so these heat diffusers are mainly for those who have built-in induction cooktops and don’t want to purchase a whole new set of pots and pans. They’re not meant to be used with the portable induction cookers as you might as well continue using your gas or electric burners for your non-magnetic cookware.
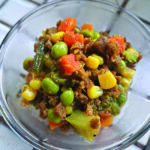
The following recipe is my version of a local Hawai‘i classic, hamburger curry. This was often served at school cafeteria meals and still is served at independent plate lunch establishments. Basically, it’s browned beef with mixed veggies that often were the bagged frozen variety. You can make this on an induction cooker from start to finish or start it on an induction cooker using a thermal cooking device then let it finish (without any electricity) in a thermal cooking container. I recommend salting right before consuming as some vegetable stocks can be quite salty and table salt may not be needed.
Hawai‘i-style Hamburger Curry
About two pounds of assorted frozen veggies
1 cup ground beef substitute (I used Betta Foods Imitation Beef which is soy-based)
2 tbsp curry powder
1 tbsp ketchup
1 tsp cinnamon
1 tsp onion powder
1 tsp garlic powder
ground black pepper and salt to taste
1 quart vegetable stock
Add everything in a three-quart stock pot that is induction compatible (a magnet sticks to the bottom) then start induction cooker at medium to medium high setting. Once the liquid starts rapidly bubbling, reduce to simmer for another 20 minutes. Alternatively, you can use a three-quart thermal cooker bringing up to a boil then place the thermal pot in its vacuum outer case, close the cover and let sit for an hour. If the liquid is not thick enough, you can add one tablespoon of cornstarch mixed with an equal portion of liquid, increase the temperature to a boil (the thermal cooking vessel would need to be placed back on the induction cooktop) and add the cornstarch mixture with constant stirring to thicken the curry.
You don’t have to limit yourself to frozen veggies, you can use any vegetable or protein to clean out your refrigerator but if you follow this recipe, it is a vegan dish with no animal-based ingredients.
Ryan Tatsumoto is a graduate of both the University of Hawai‘i and UC San Francisco. He is a recently retired clinical pharmacist and a budding chef/recipe developer/wine taster. He writes from Kane’ohe, HI and can be reached at gochisogourmet@gmail.com. The views expressed in the preceding column are not necessarily those of the Nichi Bei News.

The Gochiso Gourmet is a column on food, wine and healthy eating. Ryan Tatsumoto is a graduate of both the University of Hawai‘i and UC San Francisco. He is a recently retired clinical pharmacist and a budding chef/recipe developer/wine taster. He writes from Kane’ohe, HI and can be reached at gochisogourmet@gmail.com. The views expressed in the preceding column are not necessarily those of the Nichi Bei News.


Leave a Reply